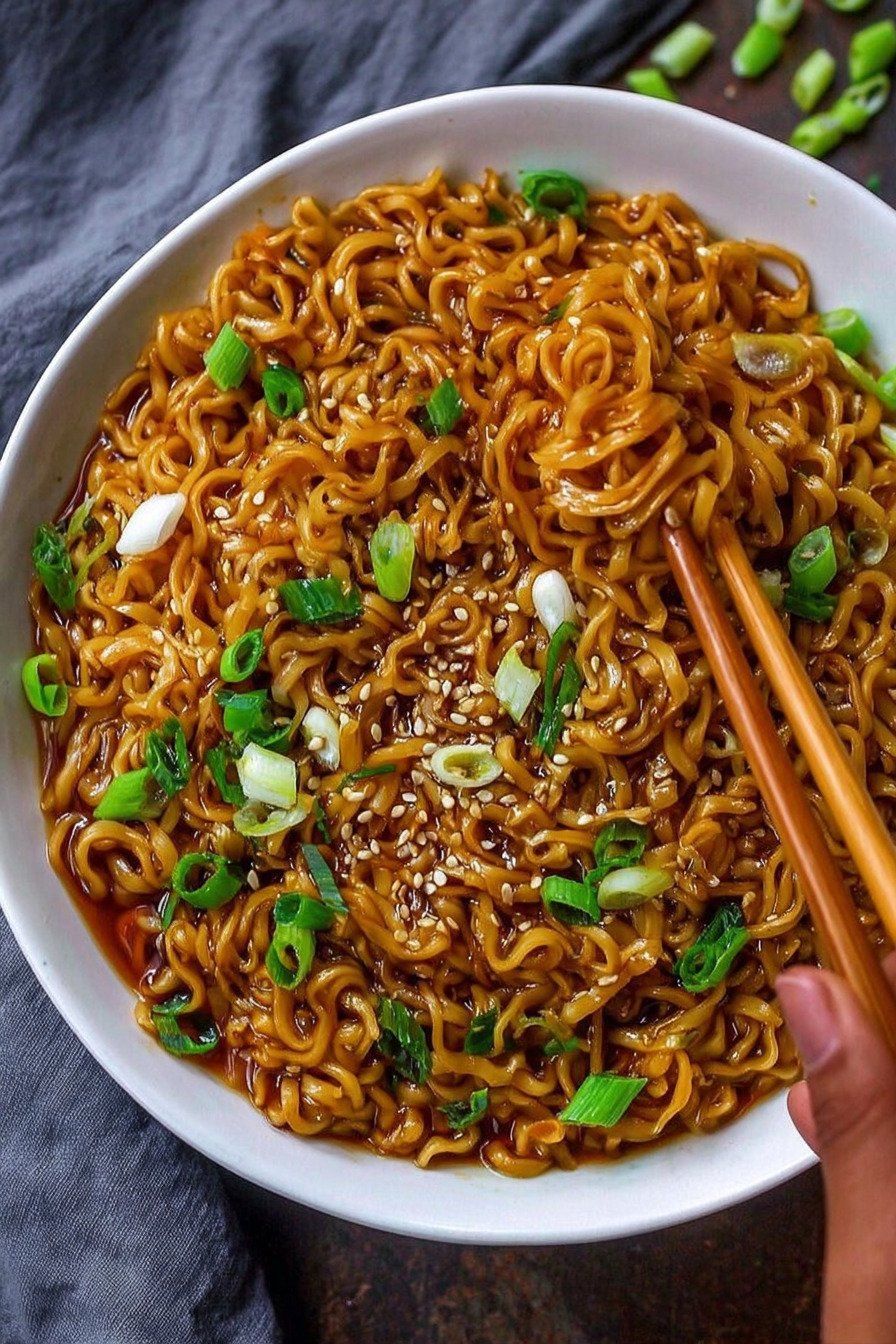
Transform a simple pack of instant ramen into a gourmet-style meal in under 20 minutes! These noodles are coated in a thick, savory, sweet, and tangy sauce that you can customize to your exact taste. It’s the perfect quick, budget-friendly, and satisfying dish for busy weeknights.
Why You’ll Love This Recipe:
- Incredibly Flavorful: A rich, glossy sauce that clings to every noodle.
- Fast & Easy: Ready in 20 minutes with minimal prep.
- Totally Customizable: Use whatever veggies or protein you have on hand.
- Perfect Texture: Chewy noodles and a thick, restaurant-style sauce.
Recipe Details
- Prep Time: 10 minutes
- Cook Time: 10 minutes
- Total Time: 20 minutes
- Servings: 2
- Course: Main Course
Ingredients
For the Sauce:
- 1 cup water or vegetable broth
- 5-7 tbsp soy sauce (adjust to taste)
- 1 ½ tsp dark soy sauce (optional, for color)
- 2-3 tbsp cornstarch
- 1-3 tbsp sugar, maple syrup, or other sweetener
- 2 tbsp rice vinegar, white vinegar, or lemon juice
- ¼ tsp ground black pepper
- ½ tbsp chili garlic sauce or other hot sauce (optional)
- 1 tbsp sesame oil
- 2 cloves garlic, minced (optional)
For the Noodles & Toppings:
- 2 servings (about 140g) dry instant ramen noodles, flavor packets discarded
- 10 oz extra-firm tofu, cubed (or your choice of veggies/mushrooms)
- Oil for sautéing
- Chopped scallions and sesame seeds for garnish
Instructions
Step 1: Make the Sauce
In a medium bowl or measuring cup, whisk together all the sauce ingredients until the cornstarch is fully dissolved and no lumps remain. Set aside. (Pro-tip: If you’re adding lots of extra veggies or protein, double the sauce!)
Step 2: Cook the Noodles
Bring a pot of water to a boil. Add the ramen noodles and cook for 2-3 minutes less than the package instructs, so they are still chewy and slightly underdone. Drain immediately. (Do not rinse if you want the noodles to better absorb the sauce).
Step 3: Sauté Your Add-Ins
While the noodles cook, heat a little oil in a large non-stick skillet or wok over medium-high heat. Add your tofu (or veggies/mushrooms) and sauté until golden brown and cooked to your liking.
Step 4: Thicken the Sauce
Give the sauce another quick whisk to recombine. Pour it into the skillet with your cooked add-ins. Let it simmer for 2-3 minutes, stirring constantly, until the sauce thickens and becomes glossy.
Step 5: Combine and Coat
Add the undercooked, drained noodles to the skillet. Use tongs to toss and stir everything together, ensuring every strand is coated in the sauce. Cook for another 1-2 minutes until the sauce is thick and clings to the noodles.
Step 6: Serve
Divide between bowls, garnish with chopped scallions and sesame seeds, and serve immediately!
Expert Tips for the Best Noodles
- Sauce Consistency: The cornstarch is key for a thick sauce. Start with 2 tbsp; if you want it even thicker, mix 1 more tbsp of cornstarch with 1 tbsp of water and stir it in at the end.
- Noodle Texture: Undercooking the noodles is crucial! They will finish cooking in the sauce, which prevents them from becoming mushy and helps them soak up all the flavor.
- Taste as You Go: The sauce is designed to be adjusted. Before adding the noodles, taste it and add more soy sauce for saltiness, sweetener for sweetness, or vinegar for tang.
- Broth Note: If using vegetable broth instead of water, start with less soy sauce as the broth may already be salty.
Customization Ideas
- Protein: Crispy tofu, tempeh, or edamame.
- Vegetables: Broccoli, bell peppers, snap peas, carrots, spinach, or corn.
- Mushrooms: Shiitake, oyster, or king oyster mushrooms add a great “meaty” texture.
- Spice Level: Adjust the heat with more or less chili garlic sauce, or add a sprinkle of red pepper flakes.
Nutritional Information (Per Serving)
- Calories: 401 kcal
- Carbohydrates: 143g
- Protein: 10g
- Fat: 1g
- Sodium: 3479mg
Note: Nutritional information is an estimate and can vary based on specific ingredients and portions used, especially the type and amount of soy sauce.